Wednesday, February 11, 2015

Embroidery Turtorial: My Version of a Braid Stitch!


Hello there!  I decided to skip ahead, for a moment, to a stitch that I have recently been asked about from someone who is working on one of my patterns right now..."Baby Love".  It is the stitch that forms the (what I call) braid stitch.  Below is the finished project and next to it is the braid stitch on the baby pins so you can see what I am referring to...


I began by drawing out the shape of the pin with my white chalk pencil.  Starting with a knot at the end of all 6 strands of my DMC floss, and coming up to the front with my needle, I went to the right (approximately 1/8") and came up to the front from where I began as in 4th photo down.


 Now, keeping my loose thread on top always up, I go to the right (again appox 1/8") and come up to the front, from underneath, about halfway over the top of that last stitch.  As I keep continuing this same process, you can begin to see how pretty this stitch is looking more like a braid!


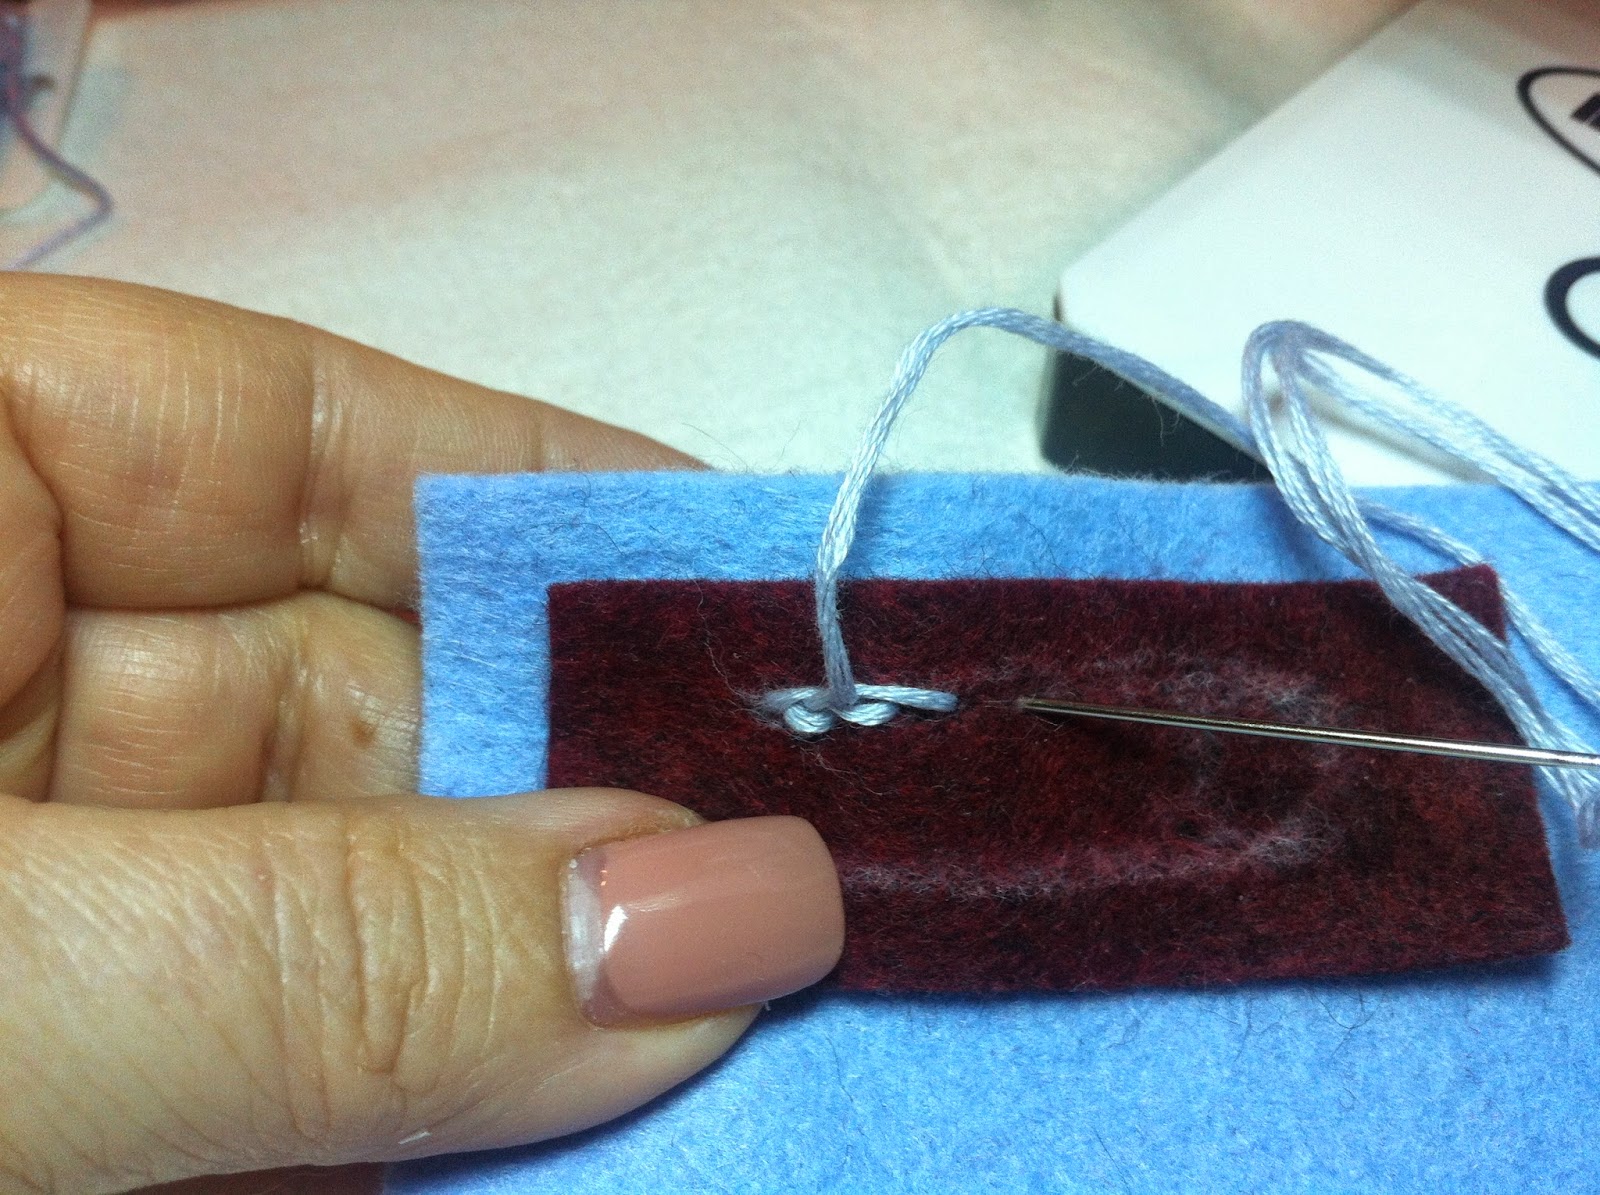


I continue to do the same stitch as I follow my chalk line rounding the corner and beginning to stitch around the entire circle.  Note that I turn my piece as I go around and have to go right over some of my previous stitches to complete the circle and begin to stitch in a straight line again.


Okay, I am at then end, pretending the top of the pin is there, as in the photos above.  I will go down at the very end of my stitches, pulling my thread to the back to make a knot.

I will now turn over my project to form a knot by catching a tiny bit of fabric on the back, forming a loop in which I will have my needle go through twice before pulling my thread tight, slowly, until the knot completes right up against the fabric as in the 3rd photo down.


Now, all I need to do to finish is to hide my thread by taking it through my fabric about a half inch (usually under something I've already stitched on the front) in between the fibers so it doesn't show on the front, cut and done!!!  Hope this is of help to you.  If it is, please post and let me know!  Thanks and, as always,
Happy Stitching!!!


Thursday, February 5, 2015

From the Beginning!

Today I thought I would answer a question that is so often asked when I am vending at quilt shows.  It is, "What is the difference between wool felt and felted wool?", and is a very good question.  I was confused about it when I first started working with wool myself.  So I my hope is, in doing these little tutorials, to start right from the beginning and help in any way I can.

 Below is what 100% wool looks like before it has been felted.  You can see how wide the weave of the fabric is and how much it frays.  Not the best, at all, for doing your wool applique' since it leaves it leaves the edges of your embroidered shapes quite messy looking.


The process of felting 100% wool is to wash it in hot water and then dry it in heat in the dryer.  The next photo is 100% wool that has been felted.  You can easily see how the weave of the fabric has pulled together tighter BUT it still has some fraying.  Also, 100% wool, even after it has been felted, is still a sort of squishy fabric and I find that my embroidery stitches don't always show up like I'd like them to. 


Which is one of the reasons I prefer to do my applique' with wool felt!  I also like that I can always depend on getting the same dye lot with wool felt.  That helps when customers see the original with certain colors and want their finished project to look exactly the same.  Wool felt is a wool blend, shows our stitches perfectly and, I find, it is much easier to work with!


 Wool felt can be felted, as well, which takes on a more rugged look but I prefer to use it just the way it is and I package all my kits without that process.  

As far as cleaning goes, the manufacturer recommends dry cleaning.  I have never had to do that but I do, every now and then, use a gentle lint roller over each of my works to spruce them up.  That seems to do the trick nicely!  

I'm so happy to be able to provide wool felt by the 12" x 18" rectangles for purchase, now, on my website!  At some point I am hoping to be able to sell it by the yard, at least in some colors, as funds allow.  
We also now sell Bamboo/Rayon felt, as I have mentioned before, that is soooooo wonderfully soft and cuddly and comes in some drop-dead gorgeous colors!

In the meantime, I hope this helped in some way!

I hope you will post any questions or feedback you may have!

Next, I'll be posting what some of my favorite tools are and why they are my favorites, how to begin a project with tips and tricks, then, if all goes well, my own stitch videos so stay tuned!
Well, blessings to you and, as always,
   
Happy Stitching!!!
 

Tuesday, February 3, 2015

Tuesday Tip!

Well, I'm happy to tell you that my son and I are working on making some tutorials to share here on my blog! I thought we might have been able to finish today but it just wasn't in the cards, as they say.  
However, I wanted to be sure not to miss giving you a Tuesday Tip before it became Wednesday!!!

So here it is...

When you need to trace lettering that you will be embroidering on your wool felt, I've been told that you can use the lightest weight tear-away stablilizer to do so!

I'll use my Grateful Hearts design as an example for what I mean...


So, where you see the lettering for Grateful Hearts, Love, Love, Love and Grace at the bottom...this would be a perfect time to use the stabilizer.  

Stabilizer is see-through, so you would place it over the sample lettering that I drew out for you in the pattern and trace the letters with a pencil right on it just as if you were tracing on tracing paper.

  Then place the piece of stabilizer with the drawn lettering over the spot where it would go on your project and embroider right through it, directly over the pencil lettering.  

Once you are finished, you'll have to cut, tear and use tweezers to pull the stabilizer away (takes patience!!) but what will be left is just your pretty embroidered lettering!!!

Yep, that's what I am told and it sure sounds good to me.  I have seen the work after it was done and it looked wonderful!

Let us know if you have ever tried this method!!!

Happy Stitching!!!


Saturday, January 31, 2015

  I am SO GRATEFUL for ALL your support in joining my blog!!!!  
THANK YOU, SINCERELY!!!
 I will try my very best to bring you the BEST tips, tricks, tutorials and such to make it as interesting as I can!

Just a friendly reminder to all those who have taken the time to join my blog, PLEASE make sure you leave a comment somewhere on the blog to be eligible for the PINCUSHION CONTEST!!!  If you have joined this blog before the contest, PLEASE leave a current comment to be eligible!!!

"The LORD bless you and keep you; The LORD make His face shine upon you, And be gracious to you; The LORD lift up His countenance upon you.  Numbers 6:24-26 NKJV


Tuesday, January 27, 2015

Here's a good Tuesday tip if your thread gets all twisted when you're stitching...
 
I just let my needle and thread dangle freely until it untwists itself!
 
Here's something else...

Have you ever noticed the dramatic change that takes place from having all your precut wool/wool felt pieces pinned or glued in place and then seeing that project completely embroidered?
 
It's fun to take before and after photos!  It sure makes you feel quite accomplished!!!  It's also great for keeping a nice record of your works!
 

This one was my "Layer's of My Heart" design that started out with my kit and shows the amazing transformation from wool felt to embroidered wool felt.
 
  What a difference, right?!!
 
One of my students decided to place buttons in the center for a very pretty change.  I love that idea!  Never be afraid to put your own spin on things!
 
And, by all means, feel free to send your photos to me.  I'd be happy to post them, if you let me!!!
 
Happy Stitching, Everyone!!!
(Don't forget our sale!) 


Wednesday, January 14, 2015

~NEW SEASONAL SALE~
Starts January 15, 2015 until March 20, 2015!!!

12% OFF ALL 100% PRE-CUTS and PARTIAL PRE-CUTS - 25% OFF ALL 100% NON PRE-CUTS and 25% OFF ALL PATTERNS on our website!!!

~NO COUPON NEEDED FOR THIS SALE~

Many items and all kits have limited quantities. Orders will be filled on first come, first serve basis so, again, please try to get those orders in QUICK!!!


And now we also sell wool felt...


which is soooo delicously soft!!!!
 

Tuesday, January 13, 2015

Here's a tip if you make a mistake when stitching...
 
I always keep a pair of tweezers on hand so when I cut away the stitches I want to take out, it's easy to pull all those loose threads from the back with my tweezers!
 
Happy Stitching!!!